Evolve is the world’s first Security Automation Cloud, with global Evolve Regions for data sovereignty, Evolve Security Zones for secure isolated automation processing, global Evolve Internal Certificate Authority for strong trusted encryption and authentication, as well as Evolve Gateways for easy integration with your internal corporate and cloud networks.
Deployment Options
Evolve automatically generates pre-configured Evolve Virtual Appliances to be deployed into your corporate networks and on-premise data centers, supporting VMware or Hyper-V, and third-party cloud providers, including AWS and Azure, as well as Docker and even a Command Line Installer for automating the build of hardware-based Evolve Virtual Appliances on devices like a Raspberry Pi for physical deployments.
Security
Secure Deployment
Evolve Virtual Appliances have been designed with security as a top priority, which means they fit within your existing security architecture.
The Evolve Virtual Appliance connects outbound back to Evolve, which means that no inbound firewall rules are required. Connectivity options includes “Direct Connectivity” if direct outbound HTTPS is available, as well as “Proxy Connectivity” including both unauthenticated and authenticated proxies, with support for both Basic Authentication and NTLMv2 to integrate with your organization’s Active Directory security policies.
This means that no firewall changes are required for a fast and simple deployment, including into secured networks that can connect outbound through proxies located in a DMZ. This also enables fine-grained security enforcement through native integration with your Active Directory security policies.
Trusted Encryption and Authentication
The Evolve Virtual Appliance natively uses the “Evolve Global Certificate Authority” to generate dedicated authentication and encryption certificates specific to your Evolve Account and your Evolve Region. This ensures strong encryption and certificate-based authentication is enforced with native anti-interception and anti-decryption controls for all network traffic between the Evolve Virtual Appliance and your Evolve Account.
The security enforcement of the Evolve Virtual Appliance is that strict that environments with SSL / TLS Decryption controls will need to whitelist the Evolve Virtual Appliance since this activity is detected as a man-in-the-middle attack that will automatically have the connection dropped by the Evolve Virtual Appliance to prevent interception attacks.
Secure Connectivity
Once booted, the pre-configured Evolve Virtual Appliance automatically registers itself within your Evolve Account. This is achieved using two parallel techniques designed to make the Evolve Virtual Appliance a powerful solution to introduce multiple remote automation and orchestration capabilities to your business.
Security Automation capabilities, such as automated penetration testing, require direct network connectivity to your internal network from your dedicated and isolated Evolve Security Zones. The Evolve Virtual Appliance connects back to your dedicated “Evolve VPN Gateway” within your Evolve Account, which uses the Evolve Global Certificate Authority for trusted certificate-based authentication and encryption.
Only the specific Evolve Security Zones that are connected to your corresponding Evolve VPN Gateway will have connectivity to your internal network. All other Evolve Security Zones within your account will not have this connectivity since they are in separate isolated environments without the required network access or routing to establish this connectivity.
Security Orchestration capabilities, such as DNS Sinkhole orchestration, are performed via the Evolve Agent running within your Evolve Virtual Appliance, providing Remote Orchestration capabilities.
The following information describes the connectivity information for the Evolve Virtual Appliance that can be used for domain or URL whitelisting in proxy servers or firewalls.
Evolve API Endpoints
*.evolve.threatintelligence.com over port 443/TCP
Used by the Evolve Agent to communicate with your Evolve Account.
Evolve VPN Gateway
*.evolve.threatintelligence.com over port 443/TCP
Your Evolve VPN Gateway static IP address and unique Evolve domain name, allocated upon orchestrationAny SSL decryption controls will need to be whitelisted for the Evolve Virtual Appliance device due to anti-interception controls.
Remote Orchestration
Evolve Virtual Appliances provide far more than just connectivity. They run an Evolve Agent to provide you with remote security orchestration capabilities to dynamically turn your Evolve Virtual Appliance into any security capability that you need. You can remotely trigger your Evolve Virtual Appliance to orchestrate into an on-demand Incident Response Environment, an internal DevOps Application Security Testing Environment, or even orchestrate production security infrastructure for breach detection, such as a DNS Sinkhole with integrated Cyber Threat Intelligence feeds.
Since Evolve Virtual Appliances can be deployed across distributed environments, including globally distributed networks, you now have the capability to automate and orchestrate on-demand security capabilities throughout your environment from a central console.
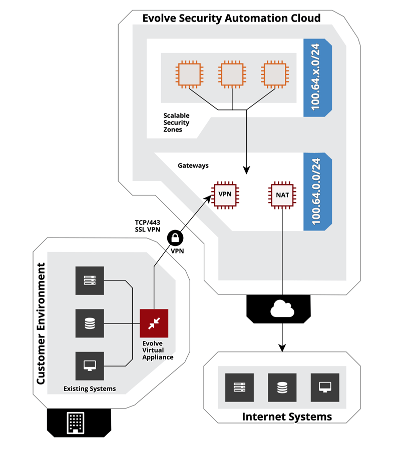
Evolve Architecture
The following architecture diagram demonstrates the connectivity between your Evolve Account and your internal network via an Evolve VPN Gateway and the Evolve Virtual Appliance:
Generating a Virtual Appliance
The following steps will guide you through the creation of an Evolve Virtual Appliance to provide remote security automation and remote orchestration capabilities.
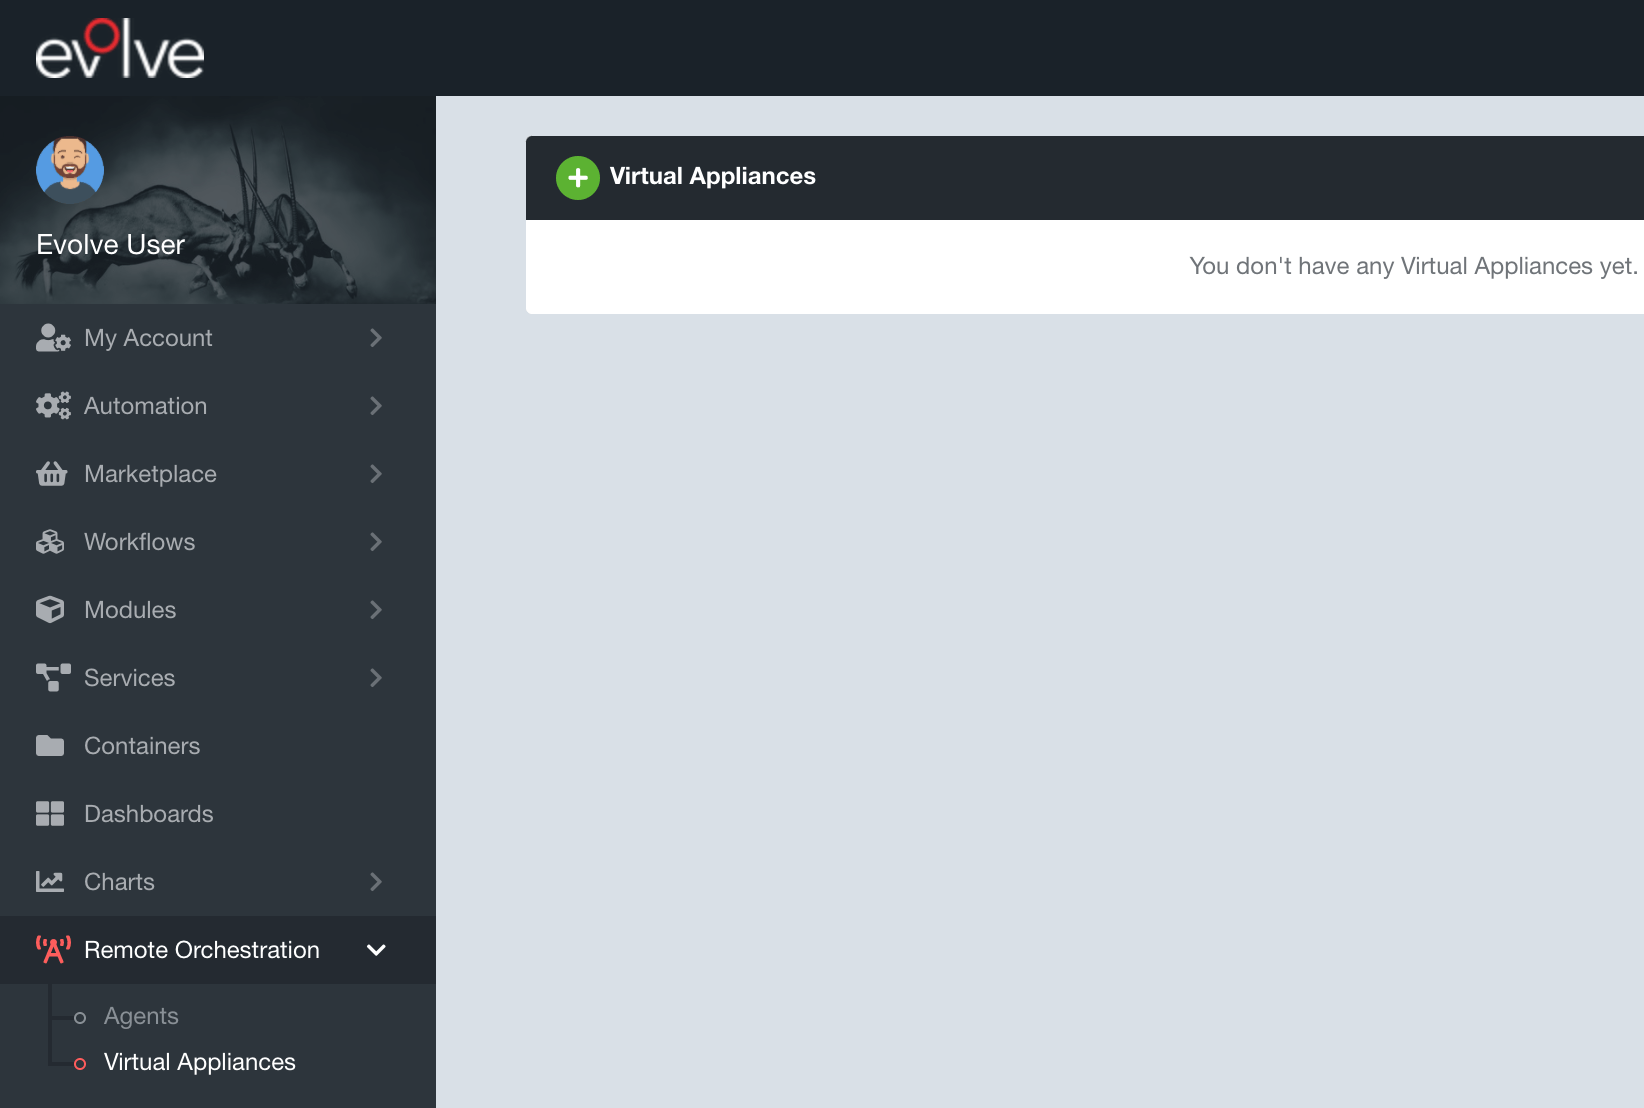
Step 1: Navigate to the Remote Orchestration → Virtual Appliances page using the side menu and the green plus button to create a new Evolve Virtual Appliance
Step 2: Select your desired Virtual Appliance format / type
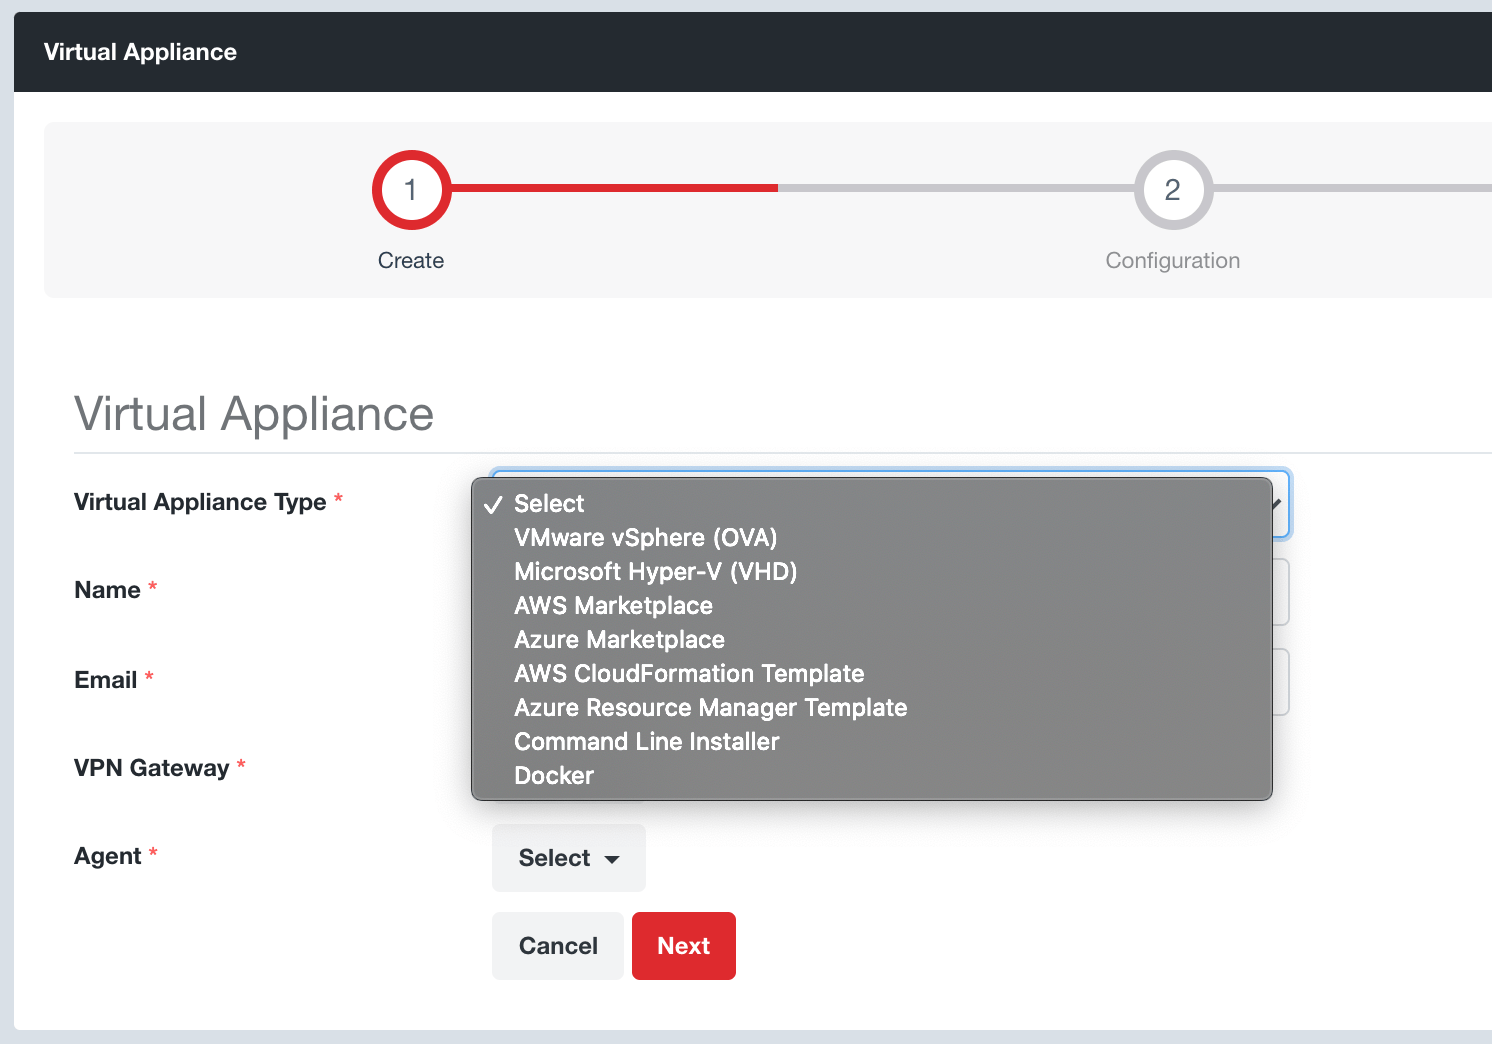
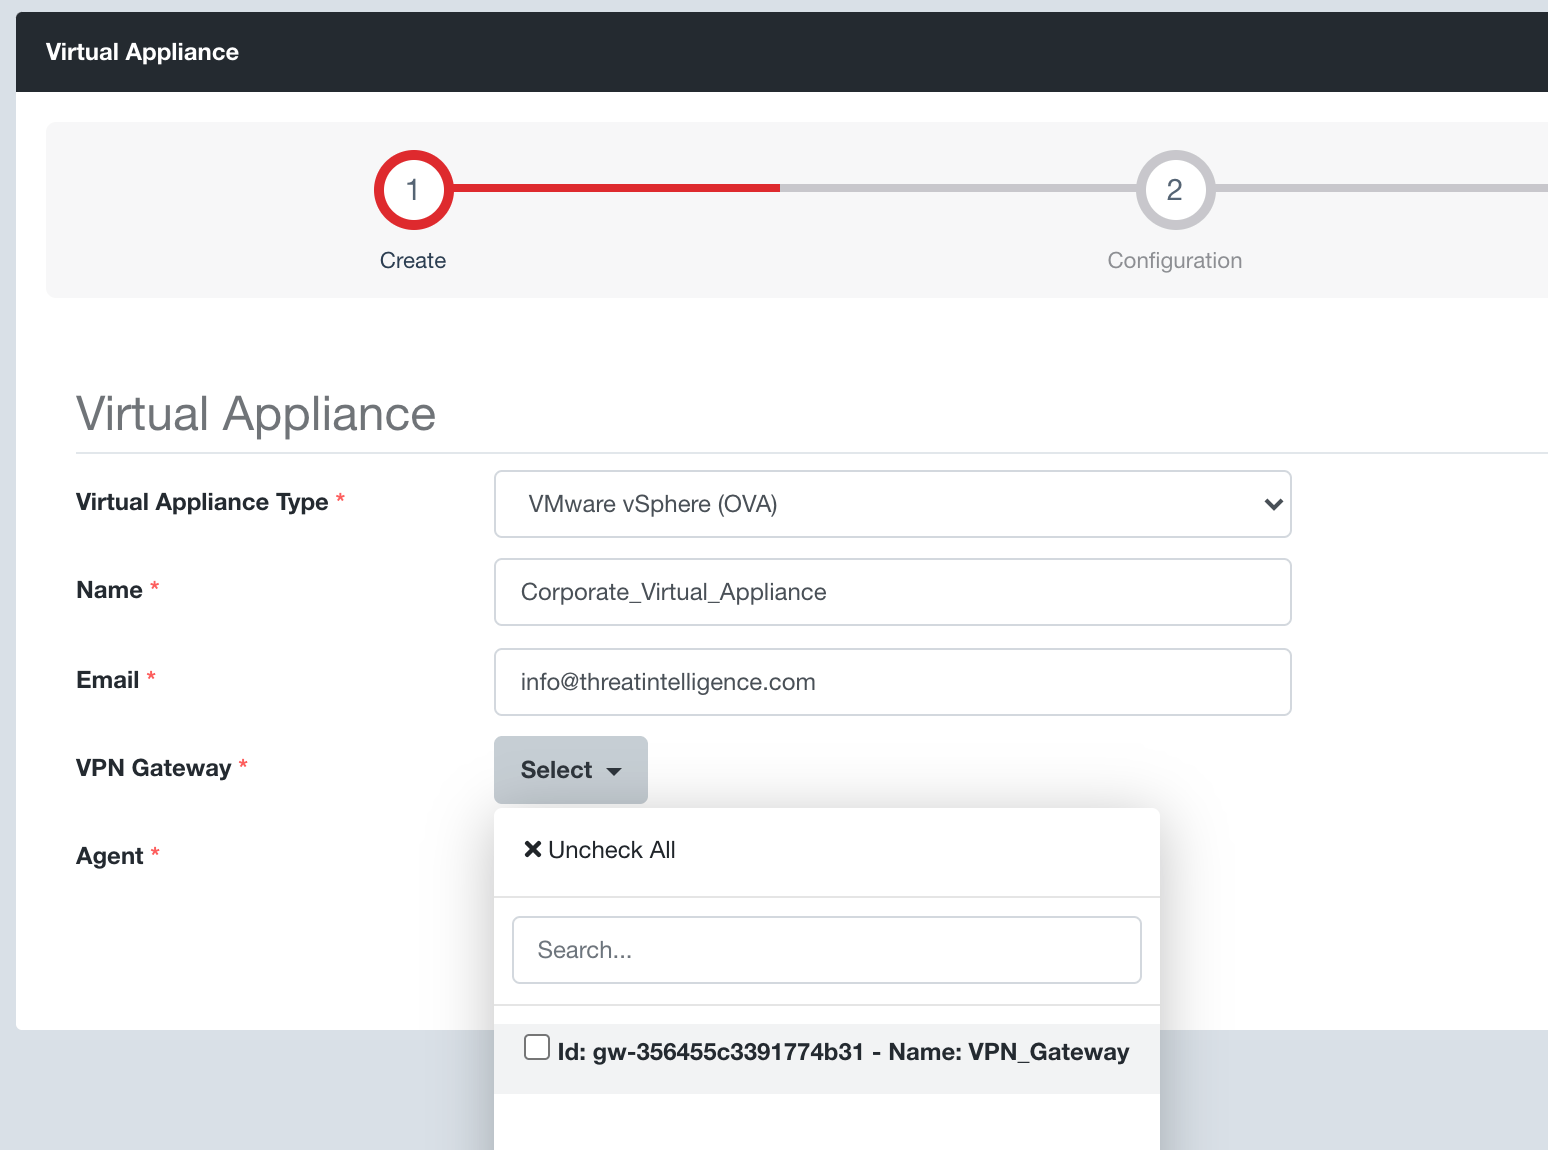
Step 3: Set a Name for your Evolve Virtual Appliance and the email address to receive your Evolve Virtual Appliance secure temporary download link
Step 4: Select your Evolve VPN Gateway that your Evolve Virtual Appliance will connect back to. This step assumes that you have already created an Evolve VPN Gateway via the Security Zones → Gateways page.
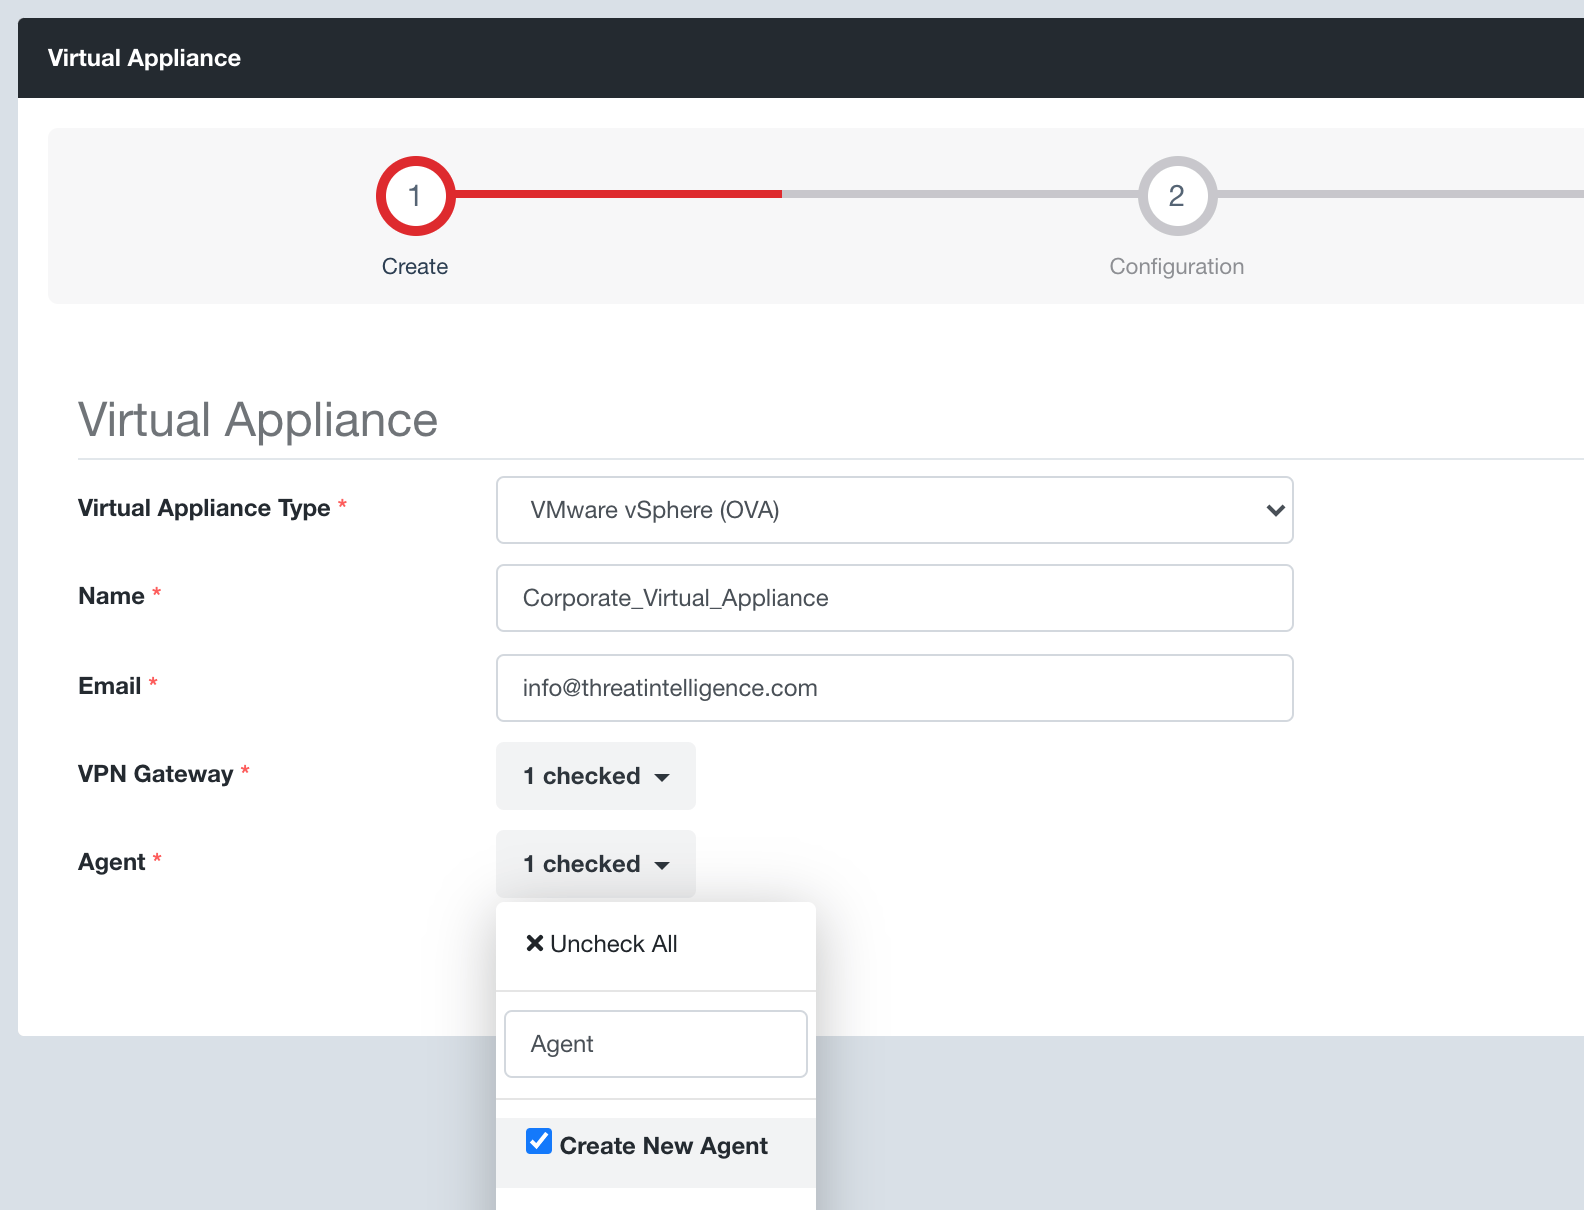
Step 5: Select your Evolve Agent that your Evolve Virtual Appliance will have installed. If you don’t have an Evolve Agent simply select the “Create New Agent” option.
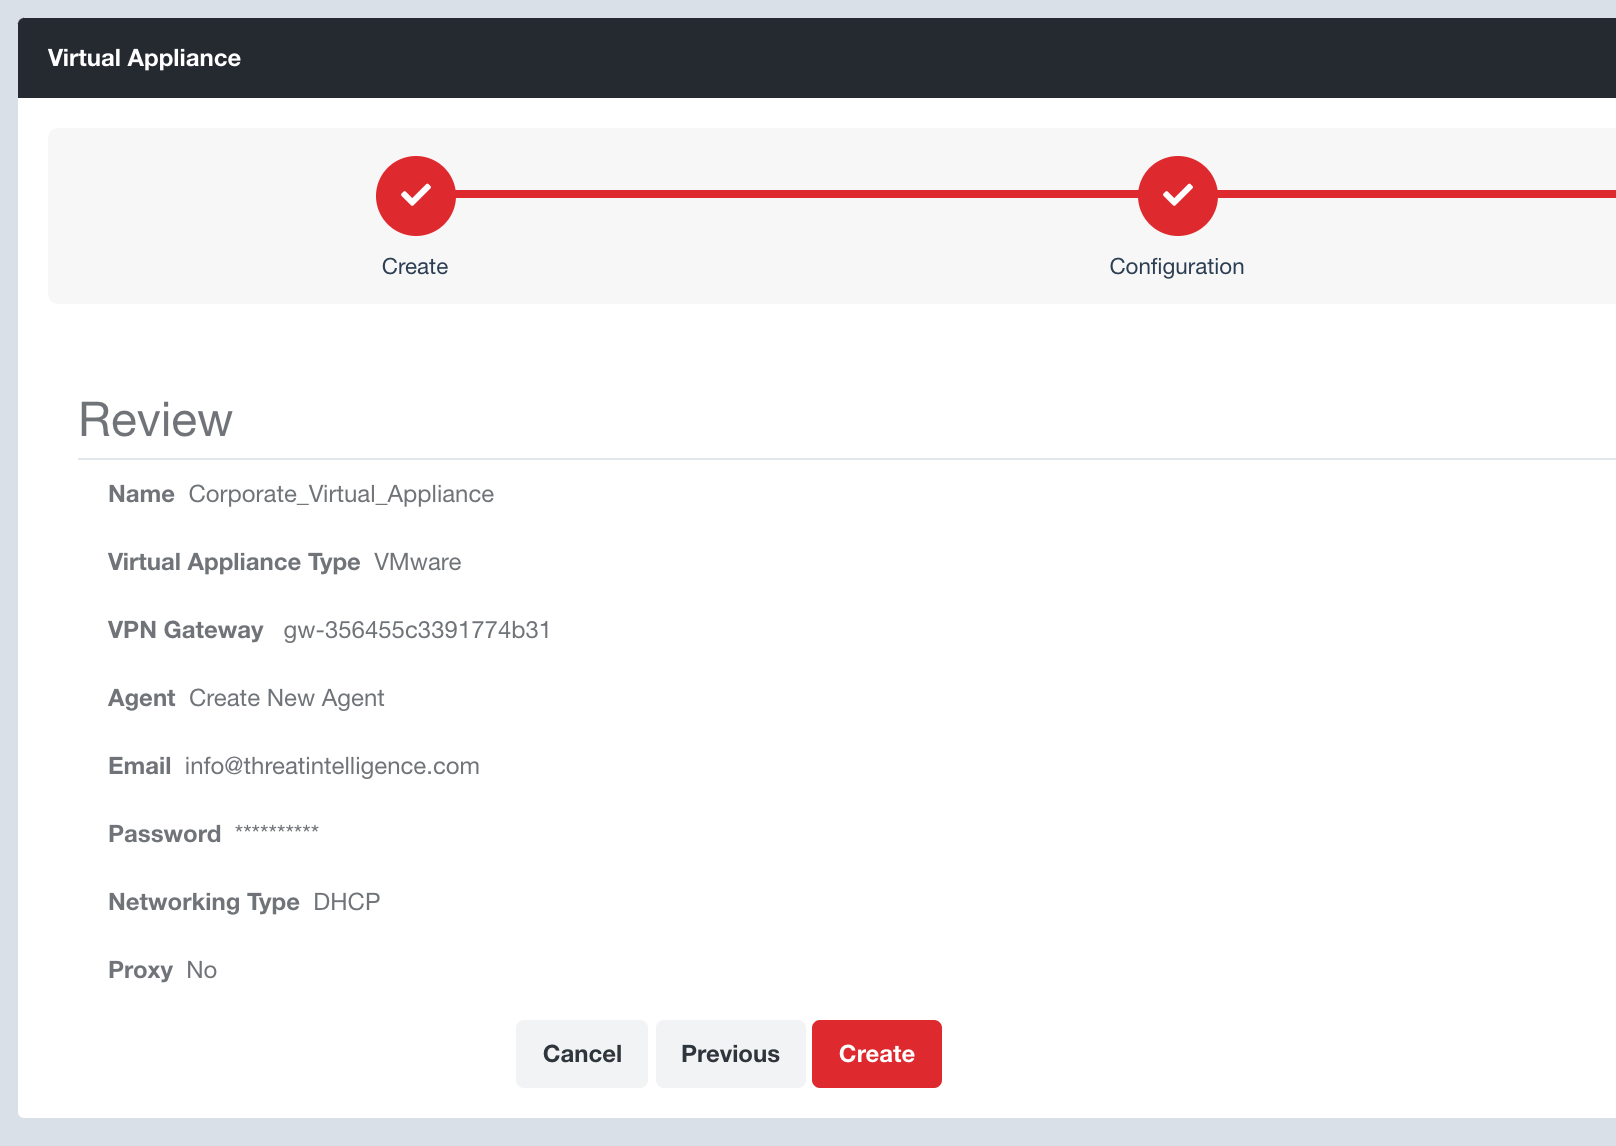
Step 7: Click the Next button, review your settings and click the Create button.
This will return you to your Virtual Appliances page where you will see that your Evolve Virtual Appliance is being generated.
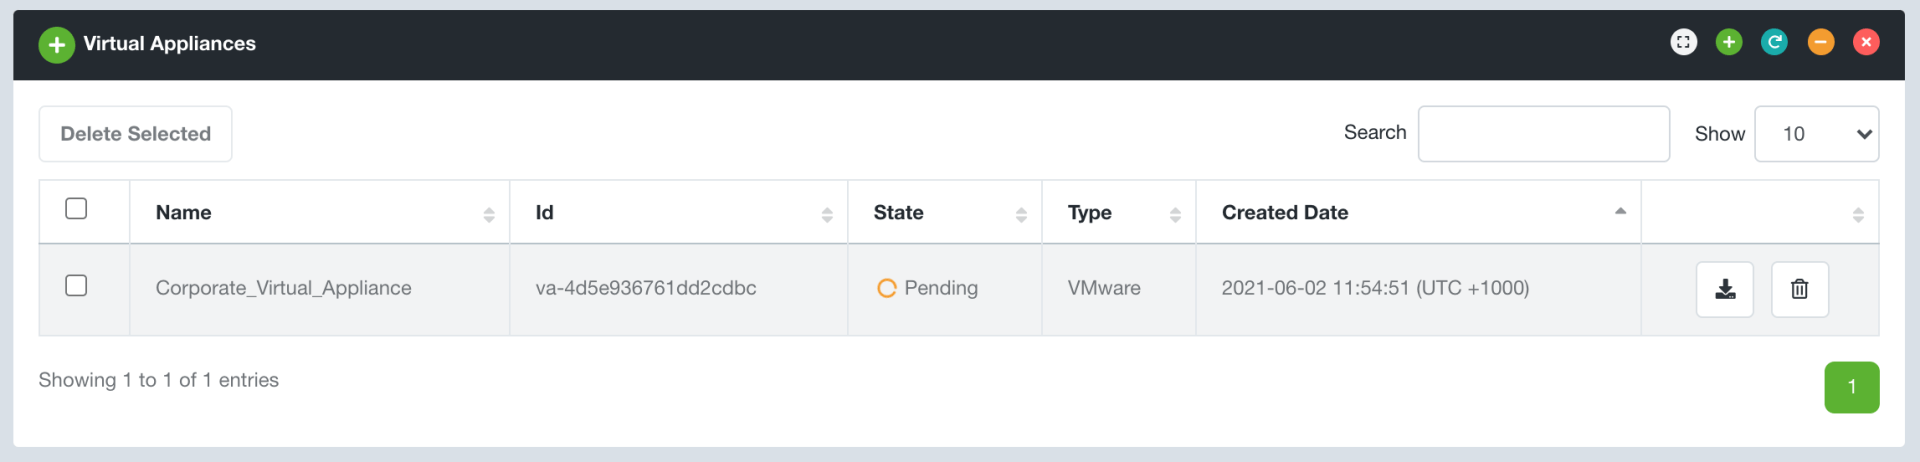
Once available, you will receive an email with a secure temporary download link. You can also download your virtual appliance at any time directly using the corresponding Download button. All you need to do now is download and boot your Evolve Virtual Appliance!
Connectivity Testing
After you deploy an Evolve Virtual Appliance, it is important to confirm that the connectivity is working as expected to ensure that Evolve can connect to the required hosts.
Evolve provides two options to test connectivity:
- Direct VPN Gateway Connectivity
- Evolve Security Zone Connectivity
Follow these steps to confirm the connectivity of your Evolve Virtual Appliance is working as expected.
Direct VPN Gateway Connectivity
Step 1:
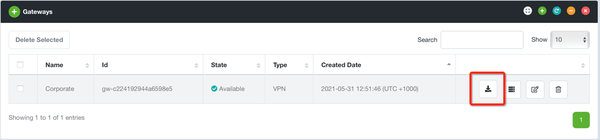
Download the VPN Gateway configuration from the Evolve Console. Navigate to Security Zones → Gateways and click the Download button for the relevant VPN Gateway.
Step 2: Evolve will provide a ZIP file with the required configuration files, including your corresponding Evolve Certificate for trusted encryption and authentication. Within the ZIP file you will find a file named user.ovpn, which is an OpenVPN configuration file.
Step 3: Download an OpenVPN client from the following sources:
- Windows: OpenVPN Client Connect For Windows | OpenVPN
- macOS: Tunnelblick | Free open source OpenVPN VPN client server software for macOS
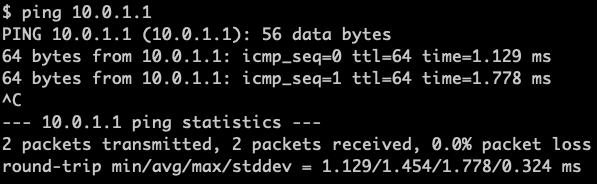
Step 4: Once your VPN connection is established you can test connectivity via the Evolve VPN through your Evolve Virtual Appliance to your internal network. Use common utilities, such as “ping” or “nmap”, to test connectivity to the hosts on your internal network.
Note: if you are unable to install an OpenVPN client on your machine the following Evolve Security Zone Connectivity instructions may be of interest.
Evolve Security Zone Connectivity
Step 1: Import the “Kali Server” from the Evolve Marketplace so we can orchestrate a server within your Evolve Security Zone

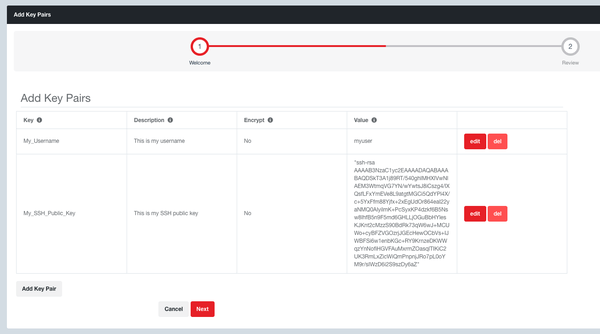
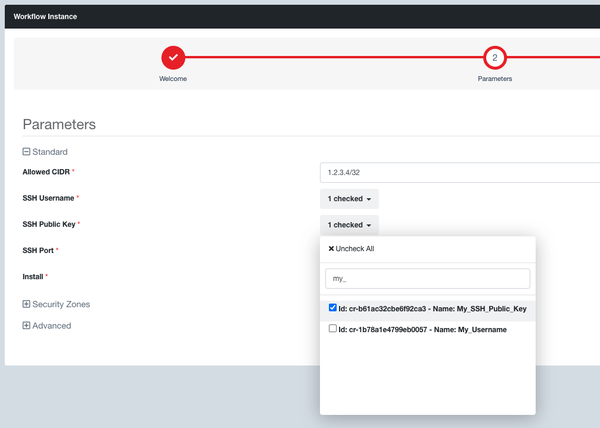
Step 2: The Kali Server workflow requires you to have created “Evolve Credentials” for your SSH username and SSH public key. Navigate to Credentials -> Key Pairs. Click the green plus button. Create a Key Pair for your SSH username (not encrypted). Create a second Key Pair for your SSH public key (not encrypted). When you paste in your SSH public key you need to surround it with quotes (eg, “ssh-rsa AAAAB…aaa”).
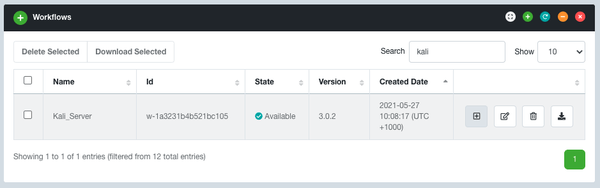
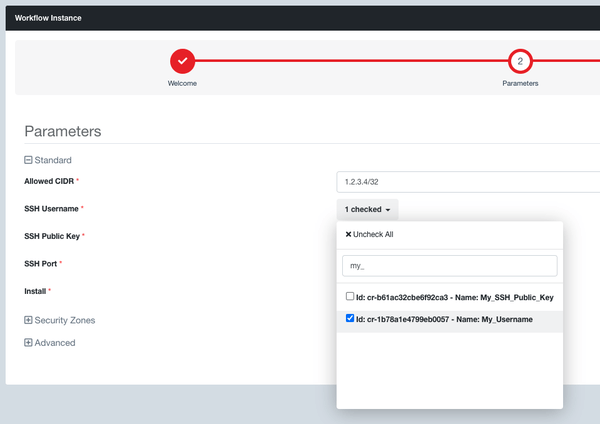
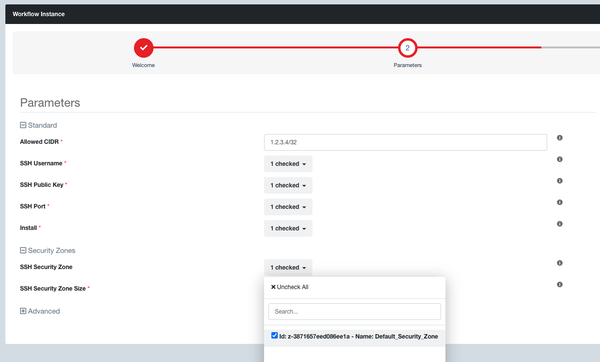
Step 3: Navigate to Workflows and launch an instance of the Kali Server workflow. If you don’t have a security zone yet, then you will need to launch one first and connect it to your Evolve VPN Gateway. Enter the CIDR you want to restrict SSH access to, select your Evolve Credentials, and set the Security Zone to be the internal security zone connected to the VPN Gateway.
Step 4: You then need to select the security zone where you want to launch your Kali Server, else Evolve will automatically create a new one for you that will not be connected to your Evolve VPN Gateway and so will not have access to the corresponding internal network.
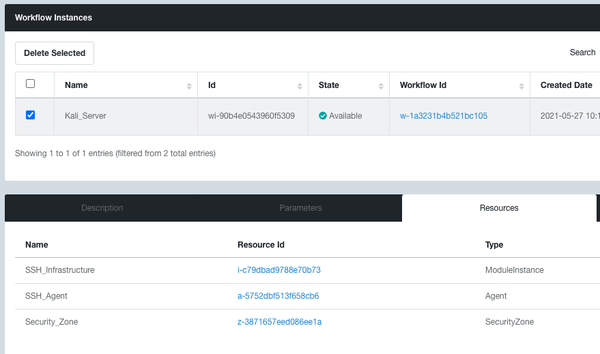
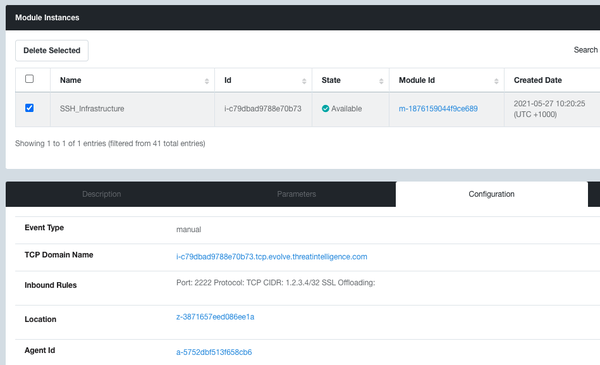
Step 5: Once the workflow instance is in the Available state, your Kali Server will get its own unique Evolve domain name. You can find this if you go to the Resources tab of the workflow instance, click the Kali Server Module Instance ID, then in the Kali Server module instance you will have a Configuration tab where you will see your Kali Server domain name.
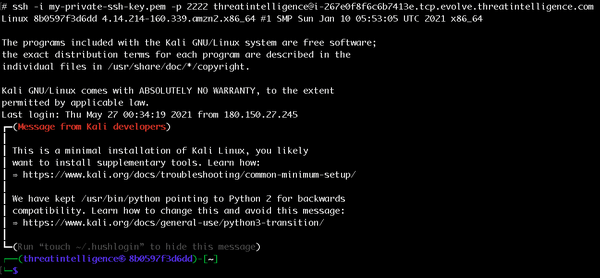
SSH into your Kali Server using the following command. It listens on port 2222/tcp:
- ssh -i my-private-ssh-key.pem -p 2222 myuser@i-yourinstanceid.tcp.evolve.threatintelligence.com
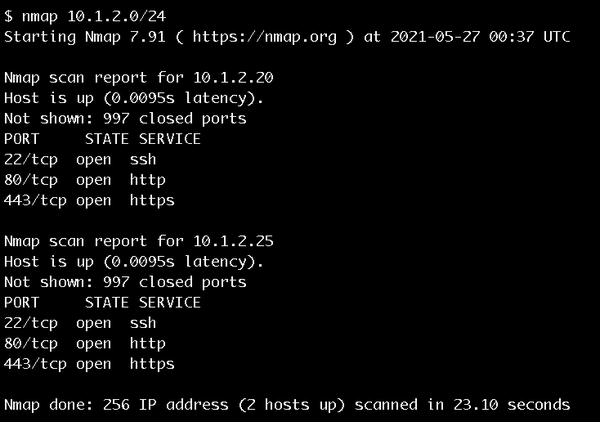
Step 6: From there you can run a nmap across a selection of the client’s private network ranges to confirm that you get the expected results.
Once you have finished testing your connection, delete your Kali Server Workflow Instance. This ensures that your security zone scales down when you are not using it.
Connectivity Troubleshooting
Internal Firewall Rules
If you don’t get the expected results, then it is likely that they have firewall rules blocking the Evolve Virtual Appliance from connecting to internal systems.
Outbound Firewall Rules
If your Evolve Virtual Appliance is configured with a “Direct Connectivity” back to Evolve, then the outbound connectivity may be getting blocked outbound at the firewall preventing it from establishing a connection. Confirm that port 443/TCP can connect back to your Evolve VPN Gateway IP address or that firewall URL filtering is allowing connectivity back to *.evolve.threatintelligence.com.
Proxy Access
If your Evolve Virtual Appliance is configured with “Proxy Connectivity” back to Evolve, then connectivity to the proxy port may be getting blocked within an internal firewall or your proxy settings configured within the Evolve Virtual Appliance are not correct. Confirm the following for your Evolve Virtual Appliance:
- Connectivity to your proxy on the correct proxy port and that port 443/TCP is allowed to *.evolve.threatintelligence.com.
- The Windows username, password and domain are correct and exist within your Active Directory with the required permissions
SSL / TLS Inspection
A less common issue is that SSL Inspection is occurring at the firewall or proxy, which attempts to decrypt the connection back to Evolve. The Evolve Virtual Appliance detects as a man-in-the-middle attack and will not establish the connection as a security precaution. This means that SSL / TLS Inspection needs to be whitelisted on your security device for the Evolve Virtual Appliance.
Evolve Virtual Appliance CLI
The Evolve Virtual Appliance also has an interactive console. SSH into the Evolve Virtual Appliance as the “evolve” user with the password that was set upon creation of the virtual appliance. This will drop you directly into the “vaconsole” prompt where you can type “help” to see the various options. There is a “test” option that allows you to test that the virtual appliance is working as expected, which includes testing that the VPN is established and that DNS is working, amongst other things. Correct anything that is not working as expected.
Conclusion
Evolve Virtual Appliances introduce powerful capabilities into your organisation with minimal effort allowing you to augment your security team with specialist security automation and orchestration capabilities. Please reach out to our support team if you need any assistance here .

Share